Sustain
July 13, 2026
· 6 min read
Using the AI chat: talk your album into shape

Every album comes with the AI Album Designer — a chat assistant that makes real changes to your book from a plain-language request. Instead of hunting for the right panel, you can just say “make the cover more cinematic” or “write a caption for this photo,” and it does it.
It’s genuinely capable, but like any assistant it does better with clear direction. This guide shows how to phrase requests, how to point it at exactly the right photo or page, and how to keep control of every change it makes.
Opening the assistant
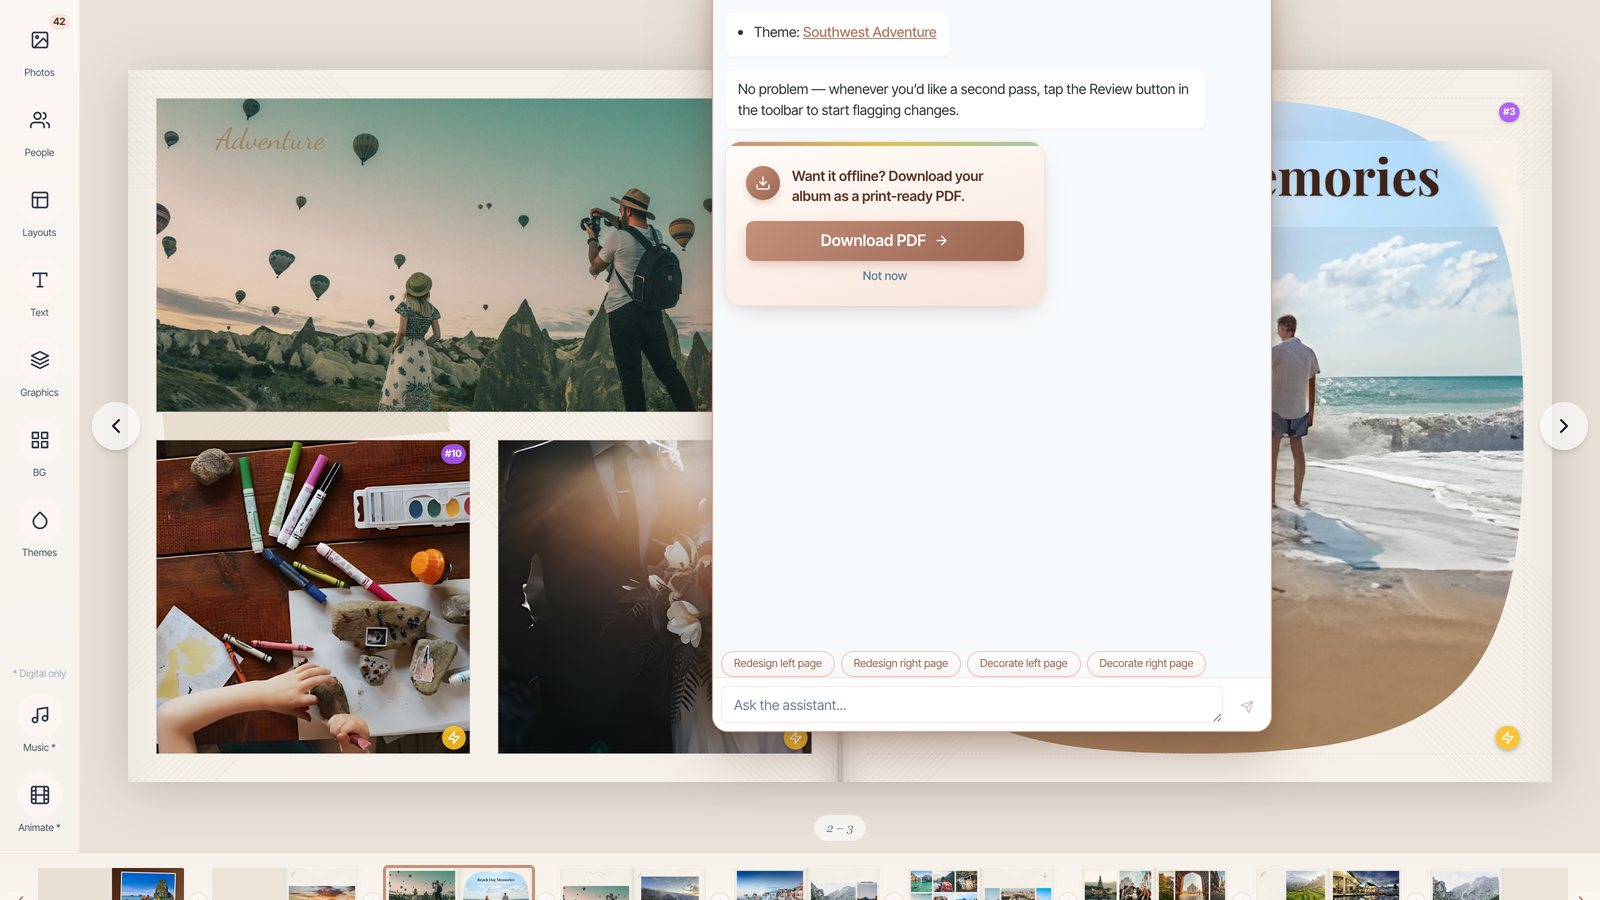
In the editor, click the chat icon in the top bar to open the AI Album Designer. It’s a floating window you can move and resize; collapse it to a bubble (Open assistant) and it stays out of your way until you need it. On phones it lives in a drawer at the bottom of the screen.
Type into “Ask the assistant…” and hit send. The status shows Online when it’s connected.
The one thing that matters most: focus
The assistant always acts within a focus — shown as a little pill in the chat. Getting this right is the difference between a perfect edit and a confusing one:
- Whole album — nothing selected. Best for book-wide changes: “apply a warmer theme,” “put every photo on a matching frame.”
- Page N — when you’re on a page. “Redesign this page,” “add a chapter title here.”
- Photo / Text / Decoration — when you’ve selected an element first. Now “this photo” means exactly the one you clicked.
Select an element to narrow the focus, or tap Clear focus to go back to the whole album. When in doubt, select the thing you want to change before you type.
How to point at a specific photo or page
You don’t have to select — you can name things directly:
- Photos are numbered. Every placed photo shows a small #N badge (like
#12). Say “swap #8 for a better shot” or “make #3 black and white.”
- Pages are just their number: “redesign page 5,” “add a page after page 4.”
- The cover and back cover you can name outright: “restyle the cover,” “add a closing line on the back cover.”
Tip
The clearest requests combine a target and an action: “Write a short caption for photo #12,” or “Change page 4 to a grid layout.” The assistant almost never has to guess.
What you can ask it to do
The assistant drives the same tools you’d use by hand — here’s the range, grouped by what you’re changing:
- Style the whole book — apply a theme (“something warmer and more rustic”), set a cover style (poster, cinematic, editorial, polaroid, minimal, documentary), or put all photos on matching cards and frames.
- Pages & layouts — redesign a page (it shows you a few variations to pick from), change a layout (grid, mosaic, panorama, and more), or add pages for a new part of the story.
- Words — suggest a title, write or rewrite captions and chapter headings, or resize/recolor a piece of text.
- Individual photos — swap a photo or find a similar one, apply a filter (b&w, sepia, vintage, warm…), or mask a photo into a shape (heart, circle, arch…).
- AI touch-ups — enhance a low-res photo (upscale) or animate one into a short clip. These cost a few credits and always ask you to confirm first.
Example prompts that work
Copy these, or use them as templates:
- “Change the theme to something warm and rustic.”
- “Make the cover more cinematic.”
- “Suggest a creative title for this album.”
- “Write a short caption for photo #12.”
- “Swap photo #8 for a similar but better shot.”
- “Redesign page 5 with a different layout.”
- “Add two pages for the beach photos.”
- “Change page 4 to a grid layout.”
- “Make photo #3 black and white.”
- “Put all the photos on wood frames with a parchment card.”
- “Animate photo #7 — make the waves move.”
- “Enhance the low-res photos.”
Let the suggestions do the thinking
When the chat is idle, it shows suggestion pills above the input that change based on what you’ve selected — like Add a caption or Find similar photos on a chosen photo, Rewrite text on a title, Redesign this page on a spread, or Suggest a title on a cover. If you’re not sure what to ask, tap one and go from there.
On the whole-album view you may also see Tag faces and Redo album texts — name the people in your photos once, and the assistant can rewrite the titles and captions to use their names.
Not sure where to start? Beautify step by step
Ask it to “beautify this album step by step” and the assistant walks the whole book with you — suggesting a theme, a cover title, chapter headings, and a few captions, one change at a time so you can review each. It’s the guided-tour way to polish an album without deciding everything up front.
You approve every change
The assistant never edits behind your back. After each request you’ll see “AI made N change(s)” with Accept, Revert, or Approve All — so you can keep what you like and undo the rest in one click. Photo and design suggestions come as cards with an Apply button. Anything sensitive, like face-aware changes, asks for your consent first.
Getting better results
- Be specific, and name your target. “Make the cover title bigger” beats “fix the cover.” Reference
#Nphotos and page numbers, or select the element first.
- One idea per message is usually cleaner — though the assistant can plan multi-step jobs (like a full page redesign or placing lots of photos at once).
- Trust its restraint. It’s tuned to use bold effects sparingly — a couple of filters, one or two shaped photos, frames applied consistently across the book. Asking for “a tasteful look” lands better than “filter every photo.”
- Changing a layout re-flows that page, so the assistant re-places your photos afterward — don’t worry if things shuffle for a moment.
Frequently asked questions
Ready to try it?
Open your albumKeep reading
Editing your album: make every page yours
The AI gives you a finished draft — the editor is where you make it truly yours. Here’s everything you can change, panel by panel.
Creating your first album
From a folder of photos to a finished, story-told book — here’s exactly how to make your first album, step by step.